Refreshing your kitchen cupboards is universally recognised as one of the most effective methods to modernise a home without spending thousands of pounds on complete structural replacements. Many homeowners initially reach for traditional rollers or brushes, only to discover that liquid paint leaves distracting brush strokes, roller stippling, and uneven drying lines across flat timber surfaces.
Choosing the best paint sprayer for cabinets completely alters this outcome by atomising liquid paint into a exceptionally fine mist that settles evenly. This modern application technique delivers an impeccably smooth finish across every panel, giving your existing cupboard doors a durable, professional appearance that completely transforms the heart of your home.
HVLP and Airless Systems for Cabinetry
Understanding underlying spray technology helps you select the correct equipment for detailed interior joinery projects. High Volume Low Pressure systems utilise a continuous stream of low-pressure air to propel paint gently onto target surfaces, providing exceptional fluid control and minimal airborne overspray. This precise atomisation makes them the preferred option for detailed cupboard doors, intricate decorative trim work, and delicate furniture refinishing.
Airless models pump unthinned paint under extreme pressure to cover vast surface areas rapidly, making them exceptionally popular for broad exterior walls, masonry, or long boundary fences. However, their intense fluid output creates substantial overspray that can easily overwhelm smaller residential interiors. For domestic kitchen updates, a dedicated high volume low pressure system remains the best paint sprayer for cabinets.
Key Features to Consider Before Purchasing
Selecting the ideal spray apparatus requires carefully examining adjustable pressure settings, total power output, and nozzle versatility. Look for models featuring highly responsive flow controls so you can calibrate liquid output precisely according to the viscosity of your chosen finish. Interchangeable spray tips are equally crucial, as specialized fine finish nozzles ensure smooth application across flat drawer fronts without clogging.
Equally important is how effortlessly the unit handles popular UK interior finishes like satinwood or eggshell paints. Lightweight handheld units reduce physical wrist strain during extended spraying sessions, while quick-disassembly mechanisms drastically simplify end-of-day cleaning. Finding the best paint sprayer for cabinets means striking a perfect balance between operator comfort, precise fluid management, and straightforward maintenance.
Top Performers for Homeowners and Professionals
Several standout models consistently earn outstanding praise from professional decorators and dedicated home renovators across the UK market. Versatile electric sprayers feature adjustable air turbine speeds and specialized attachments that handle fine architectural joinery with total ease. These clever units deliver remarkable consistency for mid-sized domestic projects while keeping technical setup straightforward for weekend DIY enthusiasts.
For decorators seeking true trade-level precision, dedicated multi-stage turbine spray systems provide flawless atomisation that builds a mirror-like sheen on timber surfaces. Meanwhile, compact electric options remain widely accessible through high-street hardware outlets for smaller, budget-conscious transformations. Each option demonstrates why investing in the best paint sprayer for cabinets yields far superior results compared to traditional manual painting tools.
Preparing Paint and Materials Correctly
Achieving a truly flawless spray finish depends heavily upon how thoroughly you prepare your painting materials before pulling the trigger. Standard interior timber enamels usually require slight thinning with clean water or specialized leveling additives so the fluid flows smoothly through narrow nozzle tips. Skipping this crucial preparation step frequently leads to frustrating nozzle blockages, uneven spluttering, and unsightly orange-peel surface textures.
Always pour your thinned material through a fine mesh paint strainer before filling the fluid reservoir container. This simple precautionary measure removes dried paint skin, dust particles, and microscopic debris that would otherwise clog the delicate internal spray needle. Thorough material preparation guarantees that your selected apparatus performs like the best paint sprayer for cabinets throughout the entire project.
Step by Step Cabinet Application Process
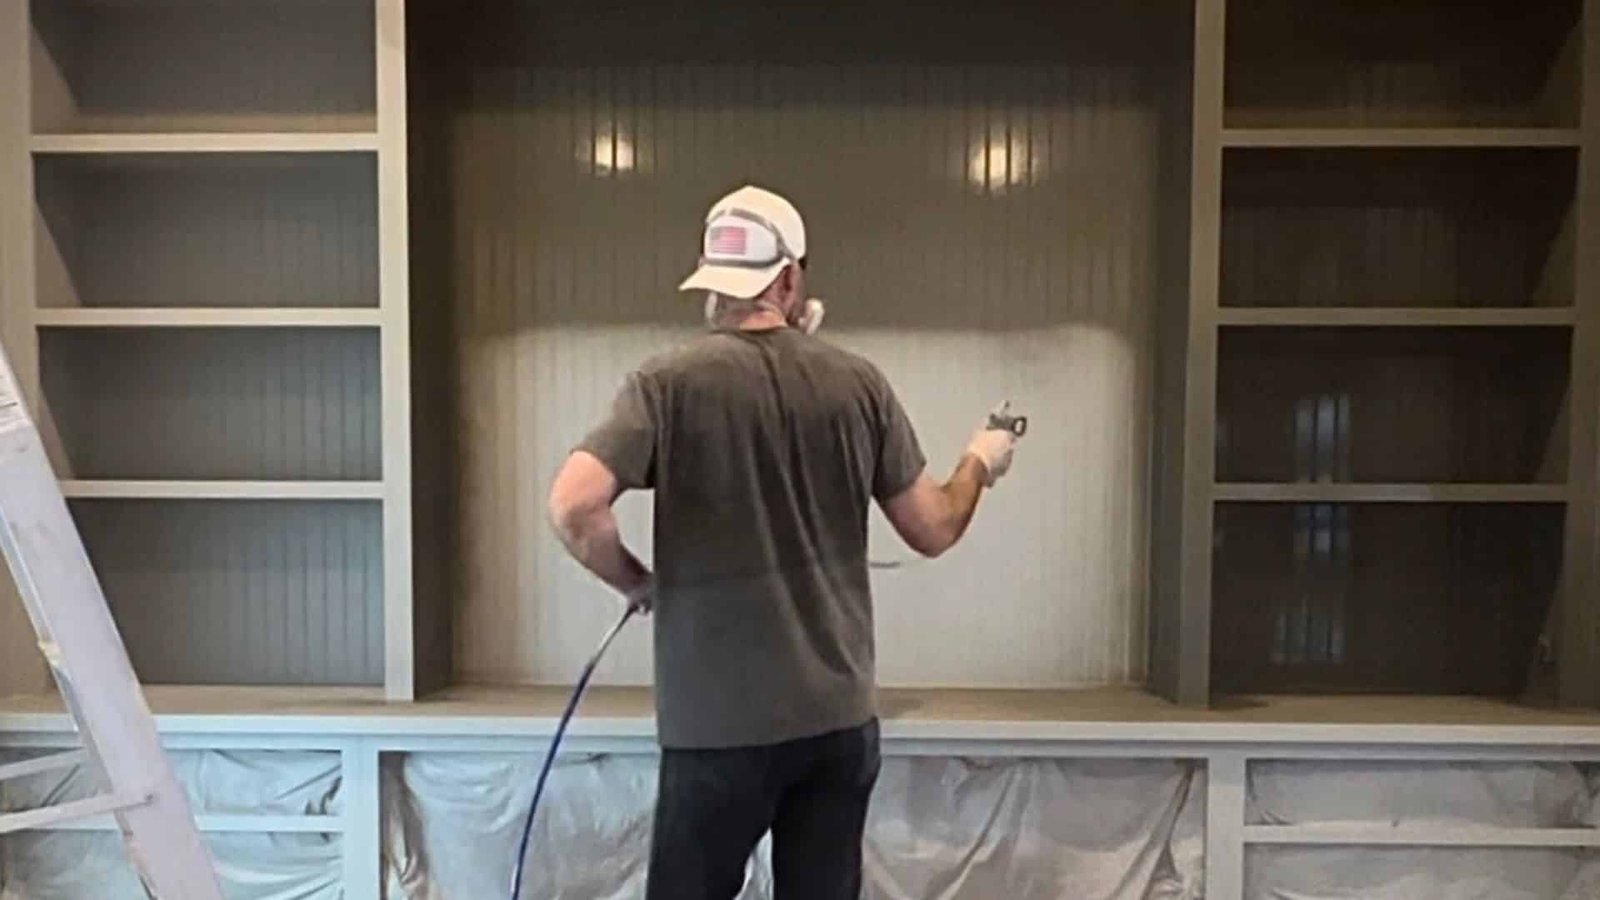
Begin by carefully removing all cupboard doors, drawer fronts, and metal hardware before thoroughly scrubbing every individual panel with sugar soap solution. Lightly abrade all timber surfaces using fine sandpaper to create an effective mechanical key for primer adhesion, then wipe away any residual dust. Construct a well-ventilated spraying booth, using durable protective polythene sheets to mask surrounding kitchen surfaces from stray airborne mist.
Apply a initial coat of high-adhesion primer followed by two thin topcoats, maintaining a consistent working distance of approximately fifteen centimetres. Sweep your arm in smooth, continuous parallel passes, overlapping each preceding stroke by fifty percent to guarantee seamless fluid distribution. Adhering to these structured steps allows even novice painters to achieve smooth, factory-quality results matching the best paint sprayer for cabinets.
Avoiding Common Painting Mistakes
Sags and runs typically occur when applying liquid paint far too heavily in a single pass or holding the spray gun nozzle too close to the surface. To prevent these frustrating blemishes, keep your arm moving continuously across the wooden panel and apply multiple thin layers rather than one heavy coat. Always allow adequate drying time between coats before performing a light intermediate sanding with fine abrasive paper.
Rough or powdery surface textures indicate that atomised paint droplets dried mid-air before successfully making contact with the wooden panel. Maintain a proper working distance and monitor ambient room temperatures to ensure the wet paint film levels out smoothly across the surface. With refined handling technique, you maximise the overall performance of the best paint sprayer for cabinets and enjoy flawless lasting results.
Conclusion
Upgrading your tired kitchen cupboards with a dedicated spray painting system offers an unbeatable combination of financial affordability and high-end aesthetic elegance. By selecting appropriate spray technology, preparing your paint materials with care, and practising disciplined application technique, you can effortlessly transform outdated wooden doors into stunning modern features. Embracing the best paint sprayer for cabinets turns an ambitious home renovation into a hugely rewarding personal success.
Frequently Asked Questions
Do I need to thin paint before spraying kitchen cupboards?
Yes, most water-based satinwood, eggshell, or enamel paints available in the UK require slight thinning with clean water or specialized flow additives. Thinning lowers the viscosity of the paint, enabling the liquid to atomise smoothly through fine nozzle tips without spluttering or causing internal blockages.
How many coats of paint should I apply to cabinet doors?
You should typically apply one coat of high-adhesion primer followed by two thin topcoats for optimal coverage and durability. Applying multiple light coats produces a substantially tougher, smoother finish and minimizes the risk of unsightly runs compared to applying a single heavy layer.
Is it better to spray cabinet doors indoors or outdoors?
It is best to spray removable cupboard doors inside a well-ventilated garage, workshop, or temporary pop-up spray tent. This controlled environment prevents outdoor dust, pollen, and insect debris from settling into the wet paint while protecting surrounding interior living spaces from stray airborne overspray.
What nozzle size works best for cabinet finishing?
A nozzle tip size measuring between 1.3 mm and 1.8 mm is ideal for cabinet refinishing applications. Smaller tip sizes work exceptionally well for low-viscosity clear lacquers and thinned topcoats, while slightly larger tips comfortably handle thicker primers and durable timber enamels.
You may also read: The Professional Fire and Water Damage Restoration Process